I hate it when so called "smart" devices require proprietary application and they differ from vendor to vendor. This is not only cumbersome, but also unsustainable as the provider could stop supporting the cloud service (or app) and make the device obsolete. This is why I use homeassistant, open protocols and open firmware whenever possible.
Last Christmas I got tired of plugging the lights every day and since I'm lazy like that, I decided to get few "smart" plugs and automate it. So far I've only had one device for balcony lights, turning them on right before sunset and off at 2AM, and it has worked worked flawlessly. It's a bit bulky and requires to cut the cord (Sonoff Mini) and I don't want to cut all my Christmas lights.
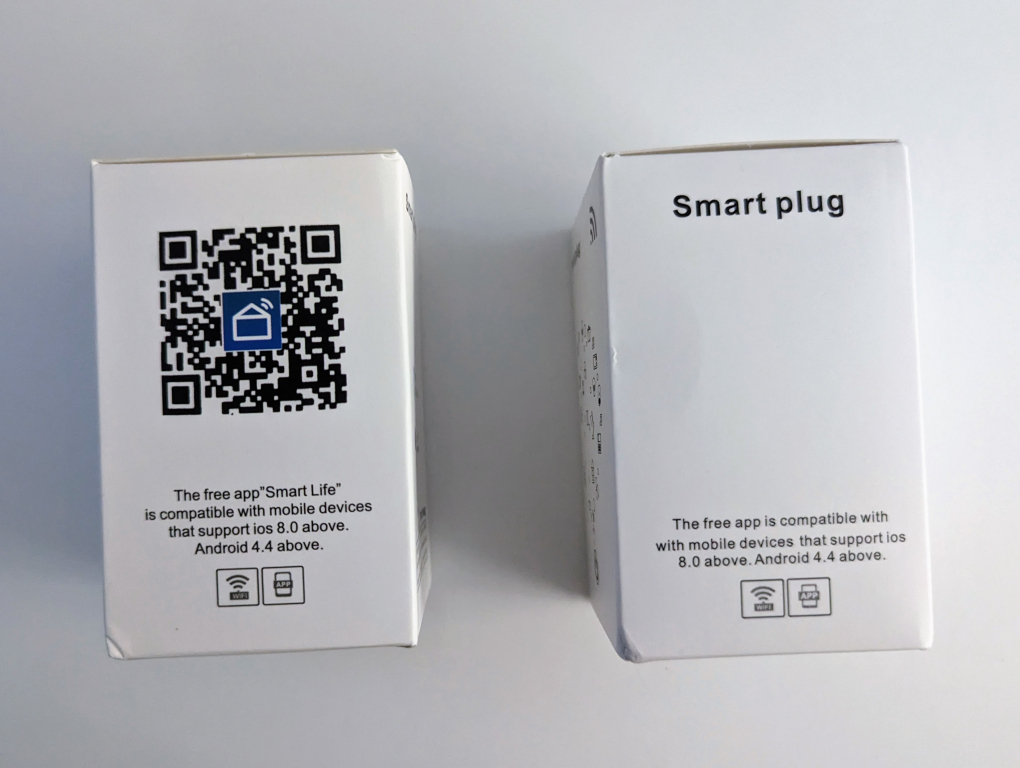
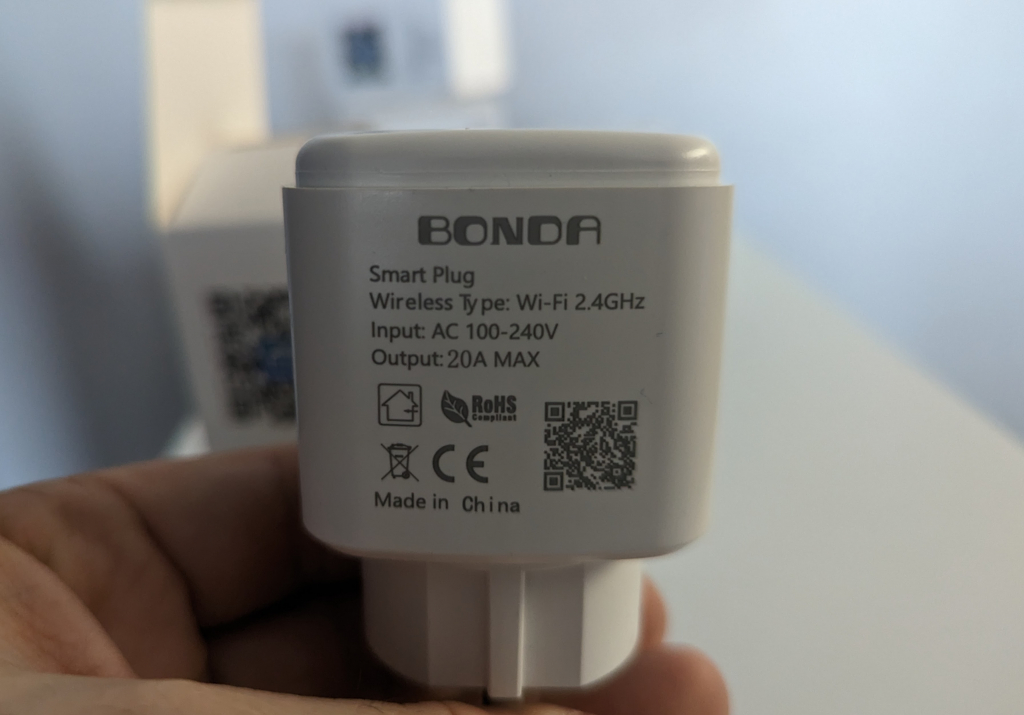
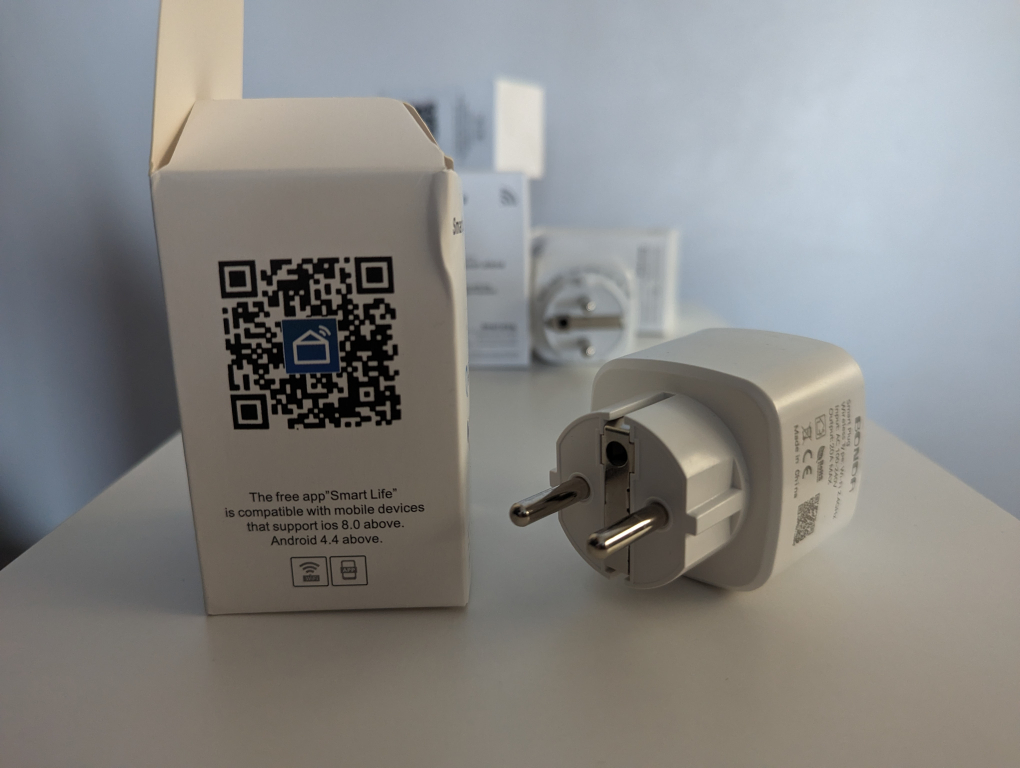
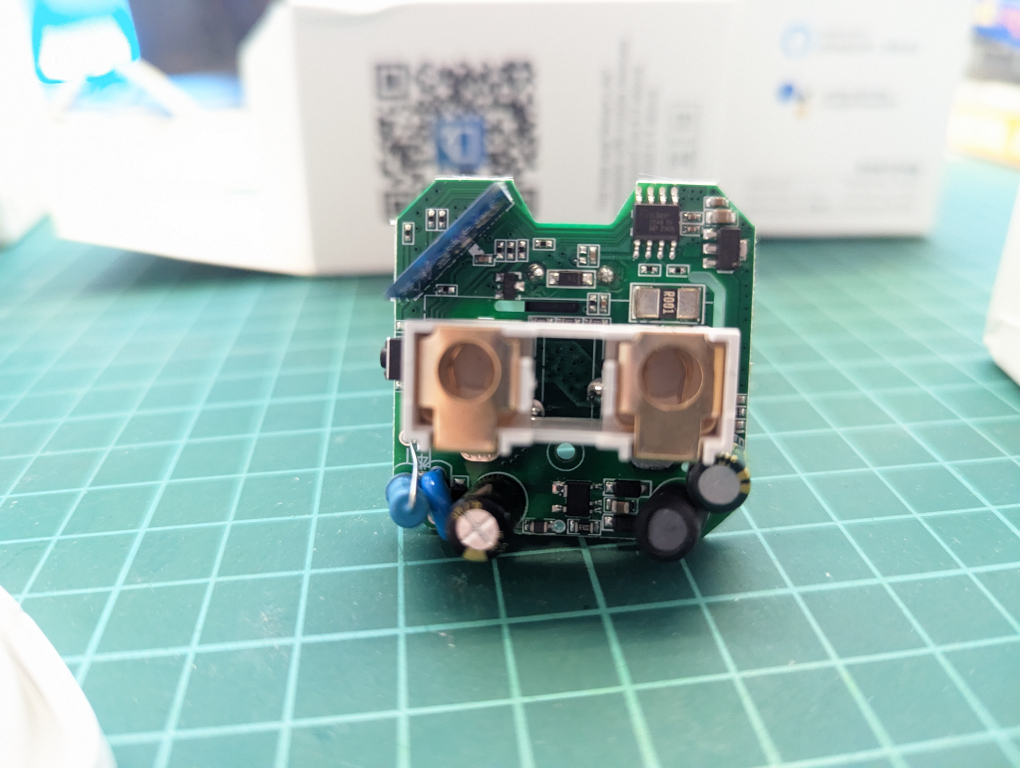
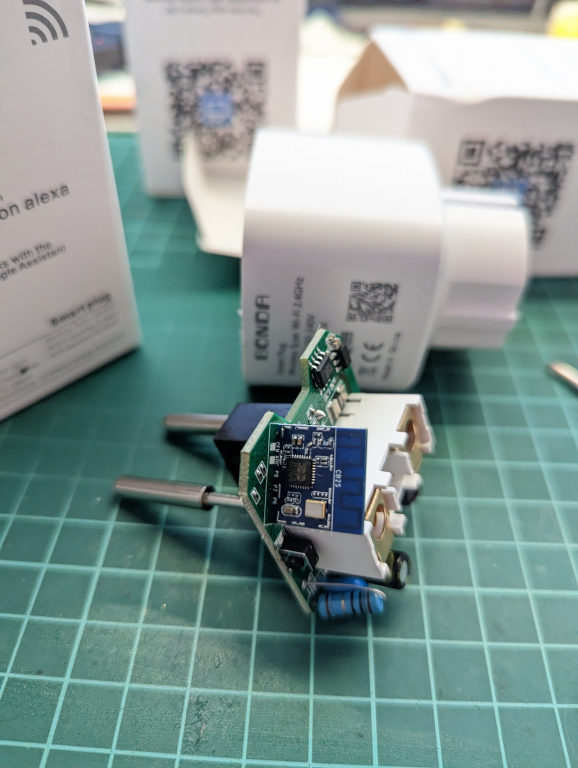
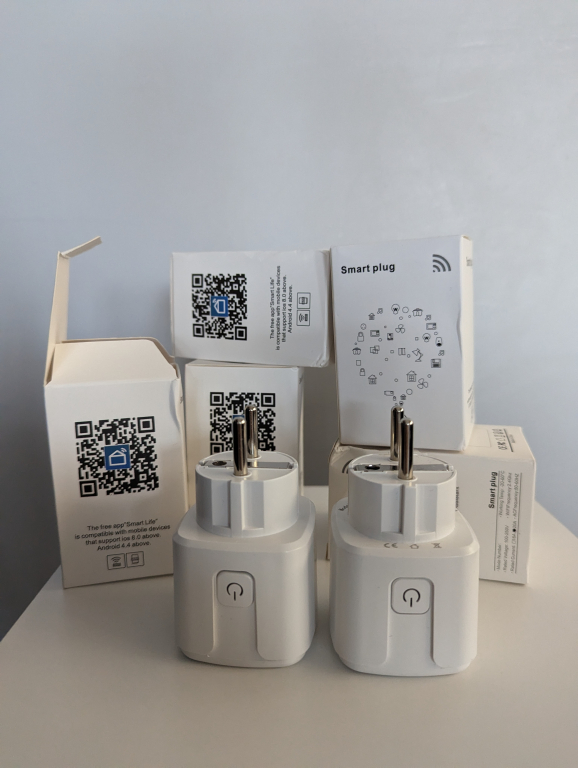
Instead, I got one of the cheapest smart plugs off Aliexpress, one that claims it also reports power usage stats, so I was hopeful it would actually have the required hardware and would probably be flash-able too. It came in an absolute noname packaging, lol, apart from some non-descriptive ID on the device (that I was unable to google-find anywhere). I just pried the plug open, checked out micro controller labels and googled for flashing options. I tried to flash it via FTDI cable, but it turned out it's not required at all, it was sufficient to just use a modding script that exploits device via native API and uploads custom firmware. When I finally got the device into homeassistant and it did all I needed it to do, I got 4 more plugs. Of course, they were slightly different, lol, even though I bought exactly the same device, but I checked it and all of them have the same internals, and flashing instructions worked for them too (success emoji).

Here's how I did it, in case someone finds this useful (hence post in English):
1. Download the Tuya Cloudcutter, tool that exploits Tuya (more or less all those no name devices have the same manufacturer) API and uploads custom firmware.
- `git clone git@github.com:tuya-cloudcutter/tuya-cloudcutter.git`;
- change directory to tuya-cloudcutter. `cd tuya-cloudcutter`
2. Run cloudcutter. The profile and 3rd party firmware that works for me is "aubess-20a-plug" and "OpenBK7231N".
- "aubess-20a-plug" seemed like the closest device from available list since plug has "BK7231N, CB2S" chipset.
- OpenBK7231N seems like a good project that works with homeassistant and it works for me well enough. Download the BK7231N "CCtr Flash" (Tuya cloud Cutter flash) image from https://github.com/openshwprojects/OpenBK7231T_App/releases/ and save to `tuya-cloudcutter/custom-firmware` directory.
3. Cloudcutter process is a bit tedious, but here are the main steps:
- Run CLI command: `./tuya-cloudcutter.sh -p aubess-20a-plug -f OpenBK7231N_UG_1.15.568.bin`
- Plug device in the outlet, press and hold power button until it starts fast blinking (takes ~6 seconds). Release the button.
- While You're preparing device, terminal should print "Scanning for open Tuya SmartLife AP ....".
- Then press the button again and wait till it turns off and back on, keep it pressed until it slow blinks.
- At this point computer should have asked for admin password. provide it. Script should have found device and ran the exploit.
- If everything is correct, it will ask You to power cycle the device (unplug and plug it back in), press the button again until You get into fast blinking mode, then press button again until You are into slow blinking mode.
- Meanwhile it might ask for computer password again, should have searched for device again and hopefully found it. If You fail at any point, You can just kill and rerun the script, follow instructions from top.
- At this point it will print "wlp3s0: AP-ENABLED" and it will seem like it's doing nothing, but You just have to wait (the message in script states this too). Should take couple minutes.
- Follow the script output, it will upload custom firmware to device and eventually the script will stop.
Here's the script output example:
---
./tuya-cloudcutter.sh -p aubess-20a-plug -f OpenBK7231N_UG_1.15.568.bin
Building cloudcutter docker image
[+] Building 0.8s (13/13) FINISHED
=> [internal] load build definition from Dockerfile 0.0s
=> => transferring dockerfile: 457B 0.0s
=> [internal] load .dockerignore 0.0s
=> => transferring context: 2B 0.0s
=> [internal] load metadata for docker.io/library/python:3.9-slim-buster 0.7s
=> [base 1/2] FROM docker.io/library/python:3.9-slim-buster@sha256:0ac1e4889c90d3117680b33cbdd397e3d95098b4c6bcff8600035fa5343527ed 0.0s
=> [internal] load build context 0.0s
=> => transferring context: 3.02kB 0.0s
=> CACHED [base 2/2] RUN apt-get -qq update && apt-get install -qy --no-install-recommends git hostapd rfkill dnsmasq build-essential 0.0s
=> CACHED [python-deps 1/4] RUN pip install --upgrade pipenv 0.0s
=> CACHED [python-deps 2/4] COPY src/Pipfile /src/ 0.0s
=> CACHED [python-deps 3/4] COPY src/Pipfile.lock /src/ 0.0s
=> CACHED [python-deps 4/4] RUN cd /src && PIPENV_VENV_IN_PROJECT=1 pipenv install --deploy 0.0s
=> CACHED [cloudcutter 1/2] COPY src /src 0.0s
=> CACHED [cloudcutter 2/2] WORKDIR /src 0.0s
=> exporting to image 0.0s
=> => exporting layers 0.0s
=> => writing image sha256:45a89131482305a949b89cf4f654f02929434595d8af43ea140f6da17297b6f7 0.0s
=> => naming to docker.io/library/cloudcutter 0.0s
Successfully built docker image
Loading options, please wait...
Selected Device Slug: aubess-20a-plug
Selected Profile: oem-bk7231n-plug-1.1.8-sdk-2.3.1-40.00
Selected Firmware: OpenBK7231N_UG_1.15.568.bin================================================================================
Place your device in AP (slow blink) mode. This can usually be accomplished by either:
Power cycling off/on - 3 times and wait for the device to fast-blink, then repeat 3 more times. Some devices need 4 or 5 times on each side of the pause
Long press the power/reset button on the device until it starts fast-blinking, then releasing, and then holding the power/reset button again until the device starts slow-blinking.
See https://support.tuya.com/en/help/_detail/K9hut3w10nby8 for more information.
================================================================================Scanning for open Tuya SmartLife AP
.....
Found access point name: "A-D249", trying to connect...
Device 'wlp3s0' successfully activated with '7ab98544-c999-4296-9e88-deb255a4688a'.
Connected to access point.
Waiting 1 sec to allow device to set itself up...
Running initial exploit toolchain...
Exploit run, saved device config too!
output=/work/configured-devices/7G5qbfD5YUr6.deviceconfig
Saved device config in /work/configured-devices/7G5qbfD5YUr6.deviceconfig================================================================================
Power cycle and place your device in AP (slow blink) mode again. This can usually be accomplished by either:
Power cycling off/on - 3 times and wait for the device to fast-blink, then repeat 3 more times. Some devices need 4 or 5 times on each side of the pause
Long press the power/reset button on the device until it starts fast-blinking, then releasing, and then holding the power/reset button again until the device starts slow-blinking.
See https://support.tuya.com/en/help/_detail/K9hut3w10nby8 for more information.
================================================================================Scanning for open Tuya SmartLife AP
..........
Found access point name: "A-D249", trying to connect...
Device 'wlp3s0' successfully activated with '7ab98544-c999-4296-9e88-deb255a4688a'.
Connected to access point.
Configured device to connect to 'cloudcutterflash'
Device is connecting to 'cloudcutterflash' access point. Passphrase for the AP is 'abcdabcd' (without ')
Checking UDP port 53... Occupied by systemd-resolve with PID 61627.
Port 53 is needed to resolve DNS queries
Do you wish to terminate systemd-resolve? [y/N] y
Attempting to stop systemd-resolved.service
Checking UDP port 67... Available.
Checking TCP port 80... Available.
Checking TCP port 443... Available.
Checking TCP port 1883... Available.
Checking TCP port 8886... Available.
Flashing custom firmware...================================================================================
Wait for up to 10-120 seconds for the device to connect to 'cloudcutterflash'. This script will then show the firmware upgrade requests sent by the device.
================================================================================Using WLAN adapter: wlp3s0
Configuration file: /dev/stdin
Using interface wlp3s0 with hwaddr 08:8e:90:fb:ae:be and ssid "cloudcutterflash"
wlp3s0: interface state UNINITIALIZED->ENABLED
wlp3s0: AP-ENABLED
Using PSK v1 - Received PSK ID version 01
Processing endpoint /v2/url_config
Processing endpoint tuya.device.active
Processing endpoint tuya.device.dynamic.config.get
Processing endpoint tuya.device.property.save
!!! Endpoint response not found, using default response - tuya.device.property.save (This is usually okay and safe to ignore unless something isn't working)
Processing endpoint tuya.device.uuid.pskkey.get
[MQTT Sending] Triggering firmware update message.
Processing endpoint tuya.device.upgrade.get
Processing endpoint tuya.device.upgrade.status.update
Processing endpoint /files/OpenBK7231N_UG_1.15.568.bin
Firmware update progress: 7%
Firmware update progress: 13%
Firmware update progress: 17%
Firmware update progress: 47%
Firmware update progress: 72%
Processing endpoint tuya.device.upgrade.silent.get
Processing endpoint atop.online.debug.log
Firmware update progress: 85%
Processing endpoint tuya.device.dynamic.config.get
Processing endpoint tuya.device.dynamic.config.ack
Processing endpoint tuya.device.timer.count
Firmware update progress: 91%
[Firmware Upload] /files/OpenBK7231N_UG_1.15.568.bin send complete, request range: bytes=0-621375/621376
Firmware update progress: 94%
Firmware update progress: 98%
Firmware file has been sent and MQTT reported a progress of nearly complete. Waiting 15 seconds to ensure flashing completes.
Flashing should be complete. It takes about 15 seconds for the device to reboot and verify the flash was valid.
Please wait about 30 seconds then look for signs of activity from the firmware you supplied (either watch for AP mode or check if it joined your network).
Device MAC address: 1c:90:ff:b1:d2:49
---
4. The device will come up shortly, you can find it with wlan scanner:
---
Cell 03 - Address: 1C:90:FF:B1:D2:48
Channel:1
Frequency:2.412 GHz (Channel 1)
ESSID:"OpenBK7231N_FFB1D249"
---
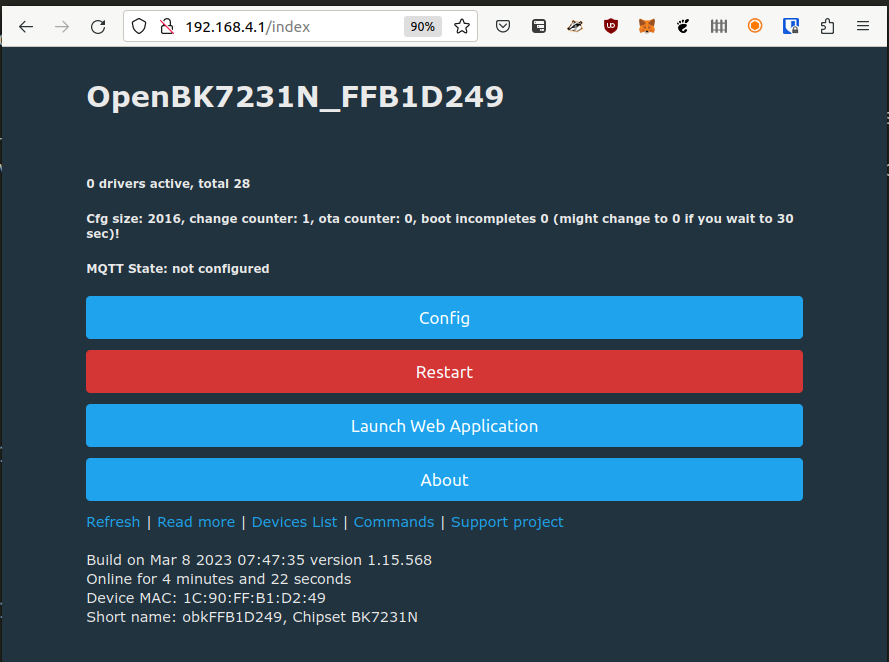
5. Connect to wifi, initial device ip (url) is http://192.168.4.1. I had to disable and enable wifi adapter for wifi networks to show up in networkmonitor applet. Configure device as follows:
- Launch Web Application to select i/o profile for plug (http://10.10.50.145/app)
- Select "Aubess Smart Plug (Aubess LSPA9 clone)" as it looks to be the closest and everything seems to work with it. Even though image says 16A, not sure if it matters. Click "Save Pins" button at the bottom of the page
- Go back to main configuration at http://192.168.4.1, configure Wifi at "Config -> Configue WiFi". Scan local networks or write connection details by hand. MAKE SURE TO ENTER CORRECT WIFI CREDENTIALS! Click "Submit", wait till it restarts and connects.
- Connect computer to network You added plug to. It should be the same network as Your MQTT service (Get the new IP address of Your plug (either from Wifi router DHCP lease list or scan network ip's). It You succeed to connect to your new device, everything still goes according to plan.
- Proceed with "Config -> Configure Names" to assign unique name to Your device. Mine is "plug1" for "ShortName" and "plug2_OpenBK7231N_FFB1D249" for "Full Name". Click submit.
- Configure MQTT at "Config -> Configure MQTT". You'll need a preconfigured MQTT instance that is connected to Homeassistant (if You don't have one, set it up first). Host should be ip of mqtt server (probably the same ip as homeassistant), my client topic is "plug1".
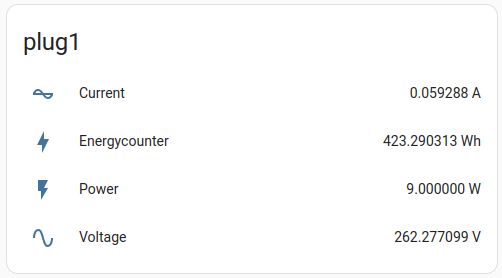
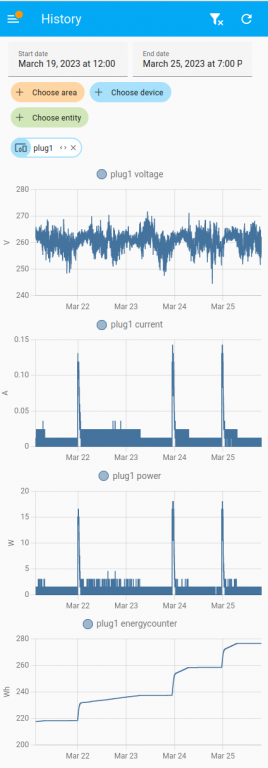
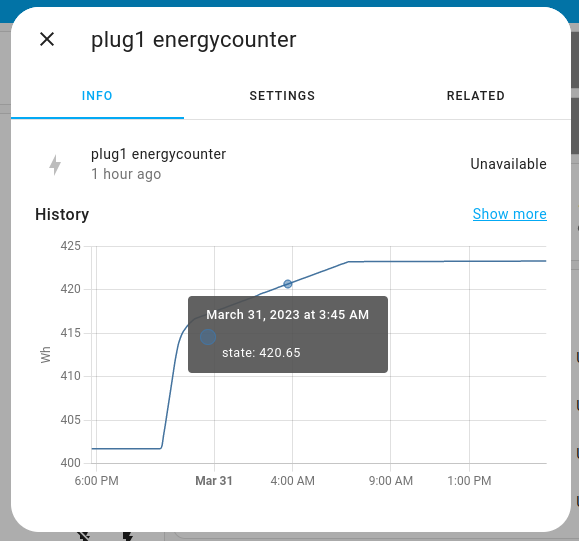
- Add device to homeassistant. Go to "Config -> Home Assistant Configuration". From here You can either manually add the printed snippet to your homeassistant configuration yaml file if You configure all devices by hand or click "Start Home Assistant Discovery". If you click the button, the plug should be discovered as new device in Your Homeassistant web UI. If it's there, the process has been successful, You should be able to see all graphs and be able to turn relay on and off.
Issues:
- I think it should be possible to toggle the relay by pressing the button on the plug, but it's not possible on my devices. I suspect pin configuration in plug's "Web Application" is incorrect or missing.
- I should check how to get the device auto power-up when plugged in. I have to turn it on via UI after i plug it in which is fine since I don't plan to unplug it too often, but also annoying. There should be a setting for it somewhere. EDIT: "Config -> Configure Startup", add "-1" to restore last state after plugging it in.
Related keywords: Bonda, BSD33, BK7231N, CB2S, Homeassistant